Oracle SOA and BPM Suites 11g include the ability to use Java components in a composite application through the Spring component implementation type.
Let’s look first at why you might want to do this and then take a look at how it is done. Many of you will know that BPEL has long included support for Java Embedding (in the Oracle extensions), so you can include Java code inside a BPEL process. Of course, it is an extension, it’s non-standard. So that might be a reason why some people may prefer not to use it. Another reason is to keep the Java code out of the process so that it can be independently maintained, updated, etc.
Side note: The OASIS WS-BPEL Technical Committee (the standards body for BPEL) did discuss inclusion of Java Embedding in the past, but it was never voted in to the standard. You can read about it in their archives if you are interested.
BPMN does not have an equivalent Java Embedding task available in its palette. So if you are using a BPMN process, you would not have the option of embedding some Java code in it. Of course, you could call a BPEL process with embedded Java, but perhaps using the Spring component is a more elegant way.
You might also ask yourself – why not just wrap the Java classes you want to call in a web service and call that from the BPEL or BPMN process, and of course that is a valid option as well.
However, if you have a Java API that you need to integrate with, or particularly if you want to do things like using Runtime to execute operating system commands on the server, then the Spring component is a good choice.
Let’s look at how to do it!
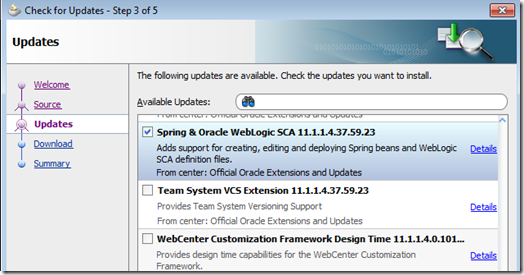
In this post, we are using JDeveloper 11.1.1.4 running on Windows 2008 Server R2, 64-bit. Our test server (where we deploy) is SOA Suite 11.1.1.4 running on Oracle Linux 5.5, 64-bit also. If you have not used Spring in JDeveloper before, you will need to install it. Select Check for Updates from the Help menu. In the wizard, select and install the Spring & Oracle WebLogic SCA update.
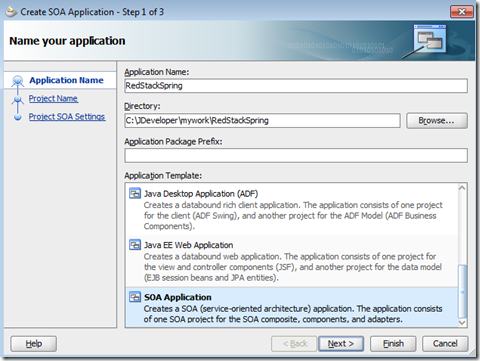
First, we need to create a new Application by selecting New and then Application from the File menu. Enter a name for the application, I called mine RedStackSpring, and select SOA Application from the Application Template list. Then click on Next.
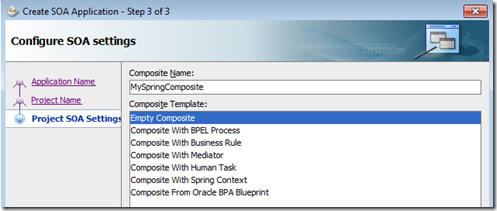
Enter a name for your project, I called mine MySpringComposite. Then click on Next.
For this example, you can go ahead and create an Empty Composite. Click on Finish to continue.
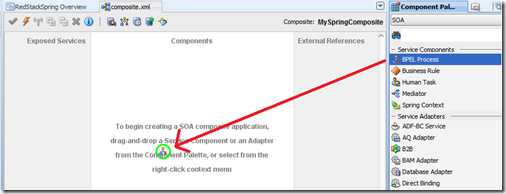
Now drag a BPEL Process from the palette across to the Components area in the middle of your composite and drop it there.
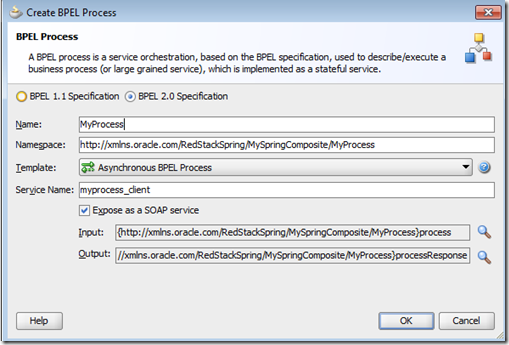
In the Create BPEL Process wizard, enter a name for your process, I called mine MyProcess and select BPEL 2.0 Specification (go ahead – you may not have used it yet, may as well try it out now). If you are using 11.1.1.3, or an earlier version, BPEL 2.0 will not be available. Leave the Expose as a SOAP service box checked and click on OK to create your process.
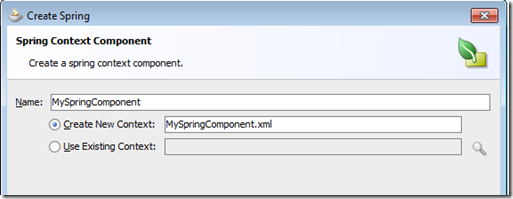
Next, we want to drag a Spring Context into the composite. In the Create Spring wizard, enter a name for your component, I called mine MySpringComponent and click on OK to create it.
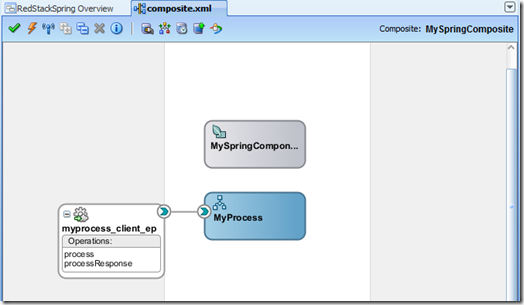
Your composite should now look like this:
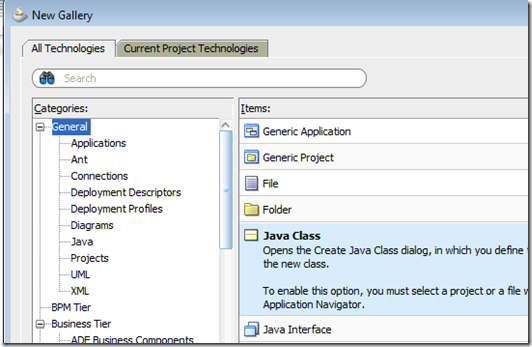
Now, let’s create a simple Java class that we can expose through this Spring component. Select New from the File menu. In the New Gallery, select Java Class from the General category. If you do not see it in the list, you may have to select the All Technologies tab at the top first. Then click on OK.
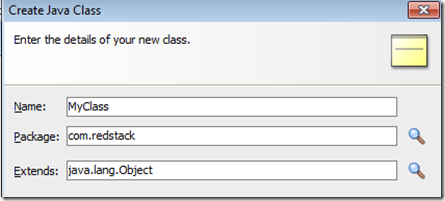
Enter a class name and package for your new class, I called mine com.redstack.MyClass. Then click on OK.
For this example, we can just create a really simple class. Of course, in real life, you can do whatever you like at this point – you can include libraries (JARs) and call whatever APIs you need to. Here is the simple demo class for this example:
package com.redstack;

public class MyClass implements MyInterface {
  public MyClass() {
    super();
  }

  public String doSomething(String input) {
    return "hello" + input;
  }
}
We will expose the doSomething() method to our composite shortly.
We are also going to need an interface, so let’s create that too. Again, select New from the File menu, and this time select Java Interface from the General category. Give your interface a name, I called mine com.redstack.MyInterface and put the following simple code in to it:
package com.redstack;

public interface MyInterface {
  String doSomething(String input);
}
Now let’s configure the Spring component to invoke this class. Return to your composite.xml and double click on your Spring component to open the MySpringComponent.xml configuration file. There will already be some data in this file. We need to add a couple of lines to point to our class. After doing so, your file should look like this:
<?xml version="1.0" encoding="windows-1252" ?>
<beans xmlns="http://www.springframework.org/schema/beans"
       xmlns:util="http://www.springframework.org/schema/util"
       xmlns:jee="http://www.springframework.org/schema/jee"
       xmlns:lang="http://www.springframework.org/schema/lang"
       xmlns:aop="http://www.springframework.org/schema/aop"
       xmlns:tx="http://www.springframework.org/schema/tx"
       xmlns:sca="http://xmlns.oracle.com/weblogic/weblogic-sca"
       xmlns:xsi="http://www.w3.org/2001/XMLSchema-instance"
       xsi:schemaLocation="http://www.springframework.org/schema/beans
         http://www.springframework.org/schema/beans/spring-beans-2.5.xsd
         http://www.springframework.org/schema/util
         http://www.springframework.org/schema/util/spring-util-2.5.xsd
         http://www.springframework.org/schema/aop
         http://www.springframework.org/schema/aop/spring-aop-2.5.xsd
         http://www.springframework.org/schema/jee
         http://www.springframework.org/schema/jee/spring-jee-2.5.xsd
         http://www.springframework.org/schema/lang
         http://www.springframework.org/schema/lang/spring-lang-2.5.xsd
         http://www.springframework.org/schema/tx
         http://www.springframework.org/schema/tx/spring-tx-2.5.xsd
         http://www.springframework.org/schema/tool
         http://www.springframework.org/schema/tool/spring-tool-2.5.xsd
         http://xmlns.oracle.com/weblogic/weblogic-sca
         META-INF/weblogic-sca.xsd">
  <!--Spring Bean definitions go here-->
  <bean class="com.redstack.MyClass" id="impl" />
  <sca:service name="test" target="impl" type="com.redstack.MyInterface" />
</beans>
The bean entry defines our Java class to the Spring context. The sca:service entry will create an interface on the Spring component that matches the Java interface we have specified. This interface will show up on the composite diagram so that we can wire the Spring component to our process. Note that the target attribute in the sca:service entry points to the bean using its id attribute.
Save this file and return to your composite diagram. You can now draw a wire from the (right hand side of your) BPEL process to the (left hand side of the) Spring component. If you get any messages about needing to compile your class, or creating WSDL, go ahead and say yes to those. Your composite should now look like this:
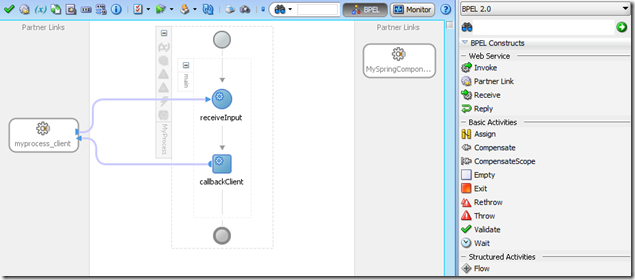
Now, let’s put some simple logic in the BPEL process to interact with the Spring component so we can deploy our composite and see it working. Double click on the BPEL Process to open it. It should look like this:
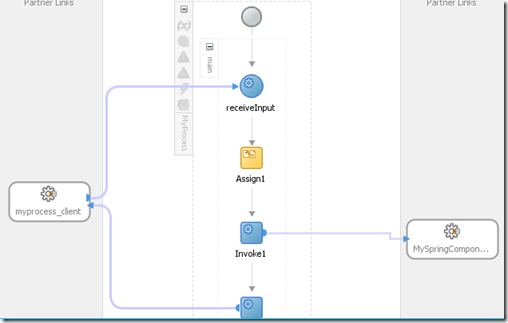
Notice that there is a Partner Link on the right hand side for the MySpringComponent that we just wired to the process. Now is also a good time to take a look at the palette for BPEL 2.0, if you have not seen it before. You will notice some new icons, some new names for some familiar activities from BPEL 1.1, and some new things added in BPEL 2.0.
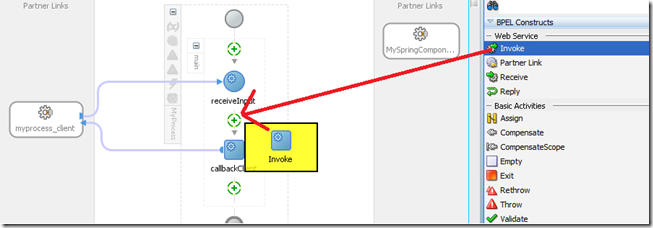
Let’s drag an Invoke activity into the process, between the receiveInput activity and the callbackClient activity:
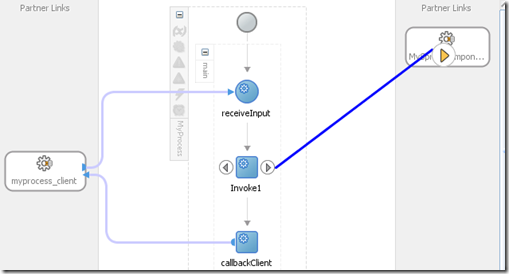
Now drag a wire from the right hand side of the invoke to the MySpringComponent partner link:
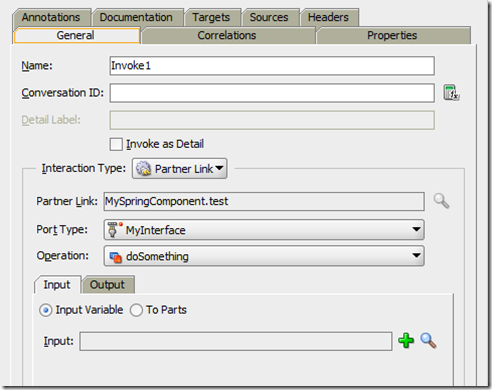
Click on the green ‘plus’ sign in the Input tab to automatically create an input variable of the correct type. Then select the Output tab and create an output variable the same way.
You can accept the default names. Then click on OK.
Now, let’s add an assign to pass the input of the process to the Spring component. Drag an Assign activity between the receiveInput activity and the Invoke you just created.
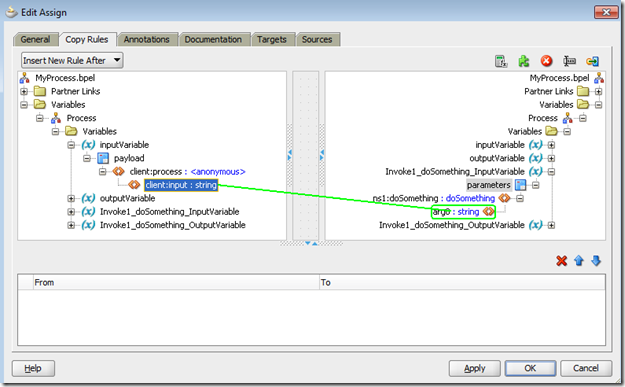
Double click on the assign to open its settings. If you have not used BPEL 2.0 before, welcome to the new Assign editor! Drag a line from the client:input inside the inputVariable on the left, to the arg0 inside your Invoke1_doSomething_InputVariable on the right as shown below. Then click on OK.
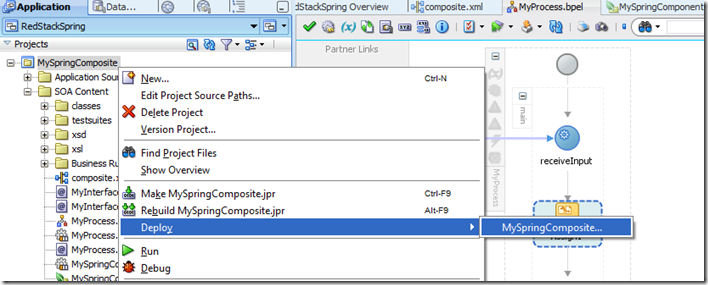
Now we are ready to deploy our composite and test it. Select Save All from the File menu, then right click on the MySpringComposite project and select Deploy and then MySpringComposite… from the popup menu.
Select Deploy to Application Server and click on Next.
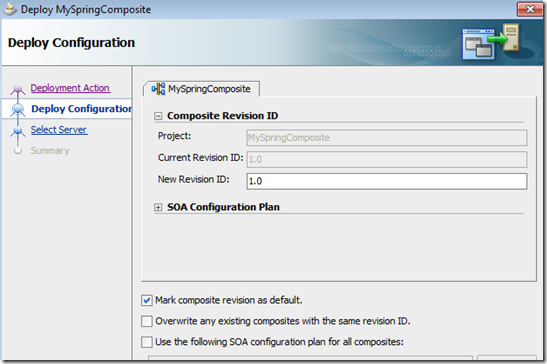
You can just click on Next on the next screen, but note that you will need to increase the revision ID or check the Overwrite any existing composite with the same revision ID option if you make changes later and want to redeploy your composite. Then click on Next.
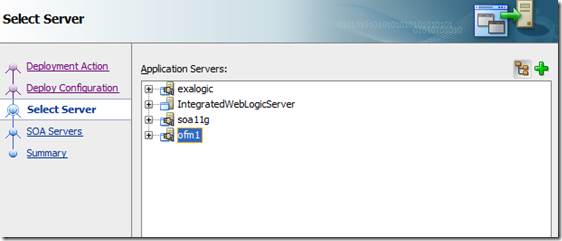
Choose your application server and click on Next.
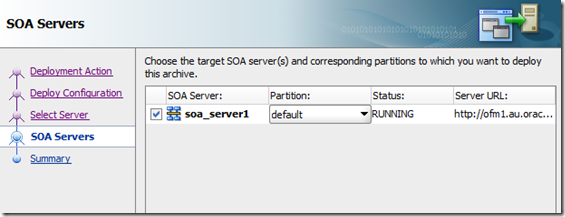
Select your SOA Server and click on Next and then Finish.
You can watch the progress of the deployment in the Deployment view. You should see something similar to this:
[05:37:03 PM] ----  Deployment started.  ----
[05:37:03 PM] Target platform is  (Weblogic 10.3).
[05:37:03 PM] Running dependency analysis...
[05:37:03 PM] Building...
[05:37:17 PM] Deploying profile...
[05:37:17 PM] Updating revision id for the SOA Project 'MySpringComposite.jpr' to '1.0'..
[05:37:17 PM] Wrote Archive Module to C:\JDeveloper\mywork\RedStackSpring\MySpringComposite\deploy\sca_MySpringComposite_rev1.0.jar
[05:37:17 PM] Deploying sca_MySpringComposite_rev1.0.jar to partition "default" on server soa_server1 [http://ofm1.au.oracle.com:8001]
[05:37:17 PM] Processing sar=/C:/JDeveloper/mywork/RedStackSpring/MySpringComposite/deploy/sca_MySpringComposite_rev1.0.jar
[05:37:17 PM] Adding sar file - C:\JDeveloper\mywork\RedStackSpring\MySpringComposite\deploy\sca_MySpringComposite_rev1.0.jar
[05:37:17 PM] Preparing to send HTTP request for deployment
[05:37:18 PM] Creating HTTP connection to host:ofm1.au.oracle.com, port:8001
[05:37:18 PM] Sending internal deployment descriptor
[05:37:18 PM] Sending archive - sca_MySpringComposite_rev1.0.jar
[05:37:23 PM] Received HTTP response from the server, response code=200
[05:37:23 PM] Successfully deployed archive sca_MySpringComposite_rev1.0.jar to partition "default" on server soa_server1 [http://ofm1.au.oracle.com:8001]
[05:37:23 PM] Elapsed time for deployment:  20 seconds
[05:37:23 PM] ----  Deployment finished.  ----
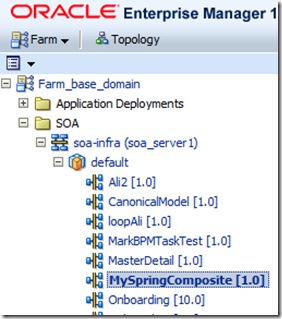
Now you can test your composite from the Enterprise Manager console. Log on to Enterprise Manager (at http://yourserver:7001/em) and navigate to your composite under the SOA folder.
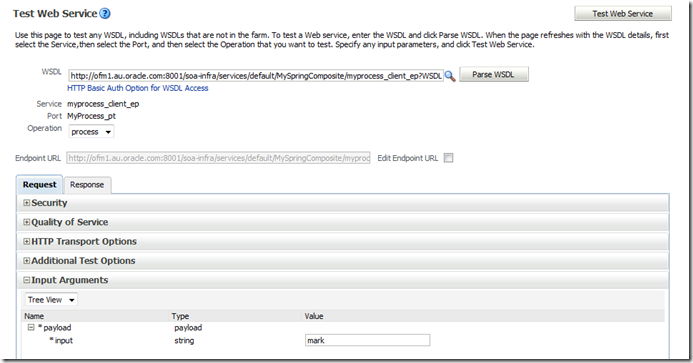
Click on the Test button to start a test. Enter some input data and then click the Test Web Service button to start an instance of your composite.
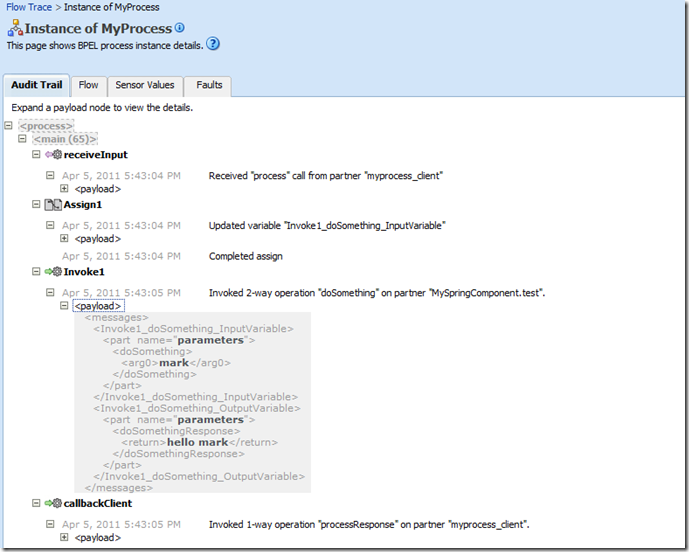
Now click on the Launch Flow Trace button to review what happened! You should see that both your process and your Spring component ran successfully. Click on the process to open it up.
Expand the payload under the Invoke1 activity and you can see the data going into and out of your Spring component (and the Java class it ran).
Congratulations! It worked!
Of course, any components can be wired together on the composite diagram, so you could just as easily call a Spring component from a BPMN process or a Mediator or even from another Spring component! Have fun!







Mark, Nice article.We have the same requirement where we have to use Runtime class to run some specific OS commands. We used the java embedded activity in bpel to achieve the same. You mentioned that spring component is best way to do this. But can you give some reasons why this is preferable over java embedding.
Thanks,
Hi,
Thanks for your comment! I think that using a Spring component is a good way to do call out to Runtime, but I did not mean to say it is ‘better’ than using Java embedding. I guess there are two main reasons why I think it is worth looking at as an option – 1. you can use it from both BPMN and BPEL (and also mediators, rules, etc.,) and 2. it provides some ‘separation’ of the code from the process. The second one is important if it is likely that the code will change more often then the process. In that scenario, the separation will allow you to minimise the amount of testing you need to do and the number of components you need to redeploy. Putting it in a Spring context also makes it inherently reusable, rather than tied to a single process. You can always create a SOAP (or other) interface out of the composite so that external applications/other composites can reuse the Spring context.
But I think that you need to look at this on a case by case basis, weigh up the advantages and disadvantages, and then make a decision based on your own unique circumstances.
Mark
mark,
This is a great posting. I am thinking to use this pattern to wrap the BPM API, so the process look-up etc can be done from anywhere in BPMN processes.
My needs are really to search and find in-flight instances on the fly and retrieve the attachments, comments to send to a content management system after a BPM instance is completed etc.
What do you think?
Regards
Oscar Rays
Hi Oscar, Yeah that sounds like a good idea to me. I am actually planning to add SOAP/REST/JSON services to this so that I can support other clients, like .Net, Obejective C, etc. Thanks for your comment
Is it possible to actually call spring component from BPMN2 process?
Yes it is, but there is a bit of a bug in JDeveloper – sometimes the Spring component does not show up in the Business Catalog. If you close the application and then open it again, it should show up.
Thanks for quick response. I suppose a WSDL interface must be generated for spring component to work in bpmn2 process? Otherwise business catalog is showing red cross over the service… I has hoping there would be a way to call direct java interface. I’m looking to sending the whole process payload to a java class, and haven’t gotten AnyType to work correctly.
Yeah I think you have to go through WSDL…
Hi Mark,
I found one minor issue in this tutorial, the MyClass should implement MyInterface.
package com.redstack;
public class MyClass implements MyInterface {
public MyClass() {
super();
}
@Override
public String doSometThing(String input) {
return “Hello Java” + input;
}
}
Thanks Abhishek!